

Most websites owners are not technical. They own a business website but don’t know how to manage it. Even if they are not happy with their web hosting provider, they keep hosting their website with them because they don’t know how to transfer a website from one host to another.
Some of them are so innocent that they think it is not possible to change the host. I have seen people asking “Can I transfer my website from one host to another?” or “How to transfer web hosting from one company to another?”.
Once I was also like one of them. I learned the process of transferring my website from one host to another by myself and In this article, I will mention how I did it.
Here is my story.
I still remember the time when I was in process of making my first website live, and I was in search for a good web hosting company. I picked a web host that was claiming 99.9% uptime guarantee, unlimited bandwidth, unlimited domain, unlimited email and what not. I put my belief on them and bought their web hosting plan.
The hosting process went smooth and I was able to put my website live in few hours.
I was happy 🙂
I was thinking, I have made the right decision. Now I can relax and focus on my business, rest will be taken care by my web host.
But, my happiness couldn’t last long. One fine day when I reach to my office and tried open my website, It shows me an error. I was shocked, why I am not able to open my website, what’s going wrong with it.
It didn’t take me long to realize that my website is down. The day going forward, this becomes a practice for my host to not keeping their promises of providing 99.9% uptime and unmatched customer support.
And finally, I decided to move my website to a new hosting provider.
How I transferred my Website from One Host to Another in 3 Easy Steps?
Transferring a website from one hosting provider to another is not very difficult. At least, not as difficult as it seems.
If your website is hosted on WordPress, the process becomes, even more, easier.
I think I was lucky that I had chosen WordPress to built my website.
In this guide, I will tell you how I moved my website to a new host. I have broken down the complete process into 3 steps to make this guide a bit more easy to understand.
Things you need
Before we start the process, here are the things you will require to complete the migration process
- Admin login details of the website that you want to transfer
- Duplicator WordPress Plugin
- FTP access to your new web hosting provider
The Website Transfer Process
Here are the 3 steps that you need to follow to transfer your website to another host.
As I mentioned earlier, this guide is to transfer a WordPress website to a new hosting provider. So if you want to transfer your WordPress website to a new host, simply follow these steps.
Step 1: Install the Backup Plugin
The first step is to take a backup of the website that you want to transfer.
Install Duplicator Plugin on the WordPress website that you want to transfer. The plugin will create a backup of your complete website. The backup will include your themes, plugins, database, content and WordPress core files.
To install Duplicator on your WordPress website, simply go to your admin dashboard, click on plugins, now click on add new, search for Duplicator in the search box and now install & activate the plugin.
If you’ve still not got it, here is an official guide from the plugin owner.
Step 2: Create Backup Files
After you install the plugin on your WordPress website, it is the time to create a backup (package).
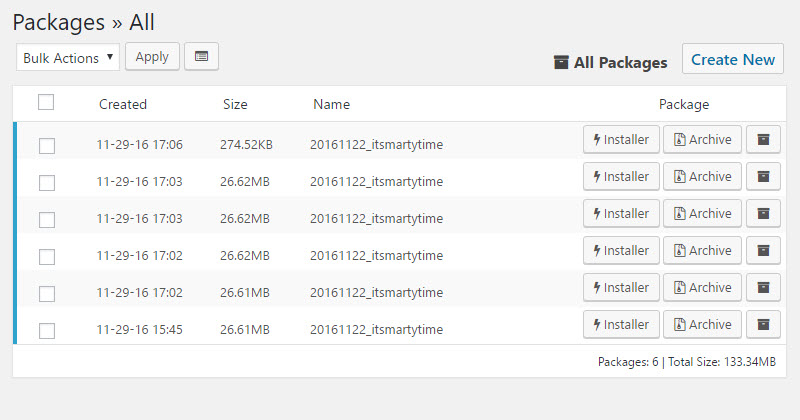
To create a package, go to duplicator plugin, click on packages and now click on “New Package”. See the image below.
After you click on the “Create New” button, you will see the below screen.
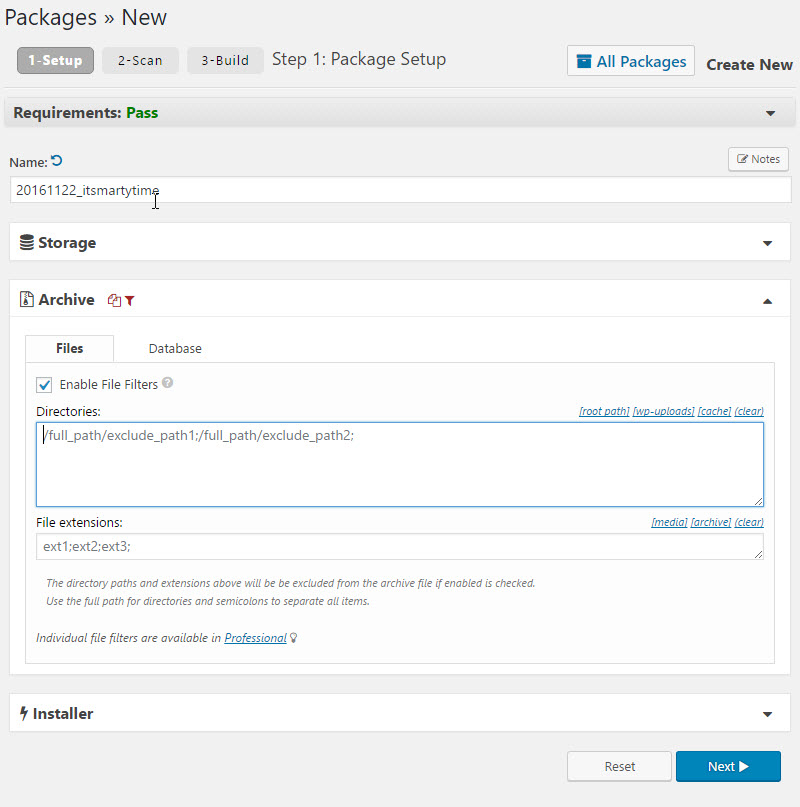
Just click on next button. Now it will take you to this screen.
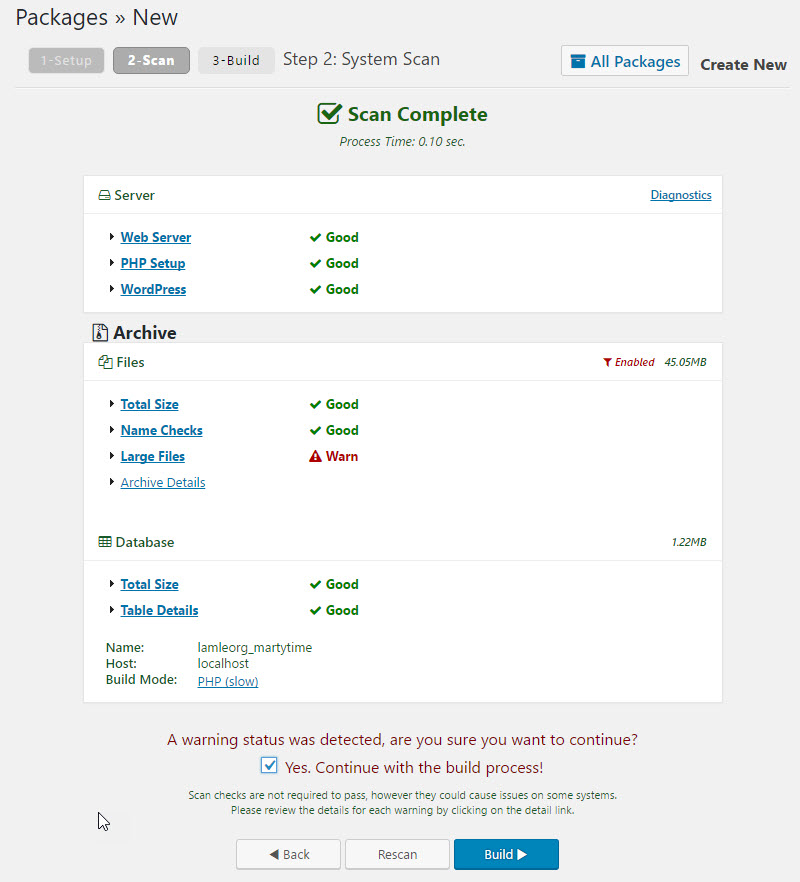
Now click on the build to create your backup and installer files.
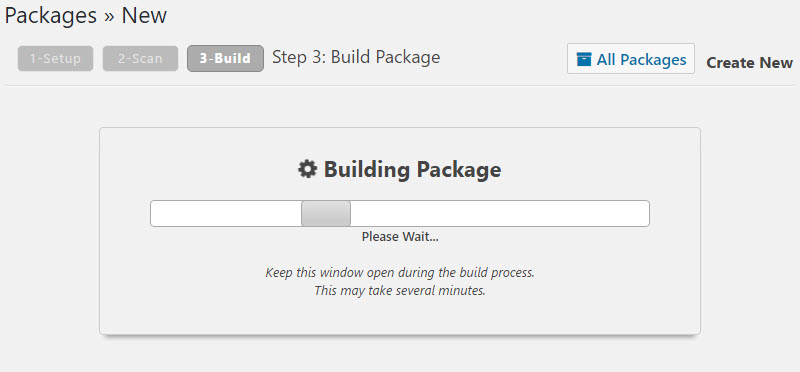
After the building package process complete, download the Installer & Archive files on your computer.
Step 3: Change Nameservers, Crate Database & Upload Backup Files
This is the 3rd and the final step.
Now you have backup files ready with you. Now go to your domain admin panel and change the nameservers to the new name servers that your new web host must have provided to you. If you don’t know the new nameservers, contact your new web host and ask them about it.
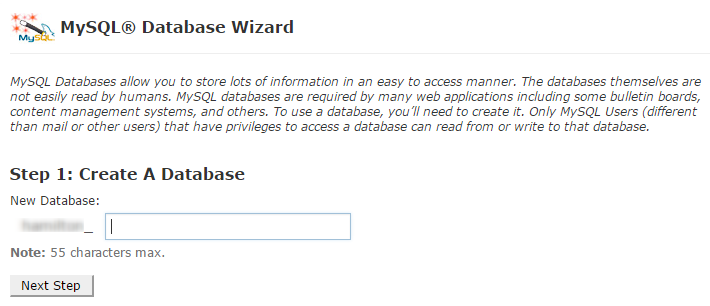
After you successfully changed your nameservers, it is the time to create a database.
Note: You may also add your domain to your hosting using cPanel if you’re using multiple domain hosting and the domain that you want to transfer is not your primary domain for that hosting account.
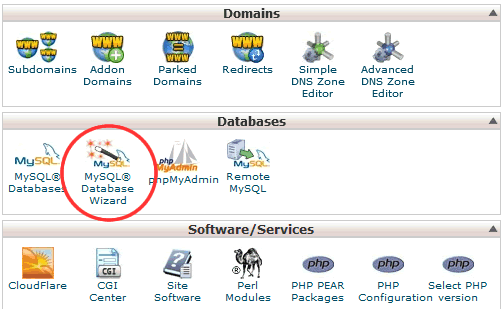
Go to your cPanel and click on mysql database wizard to create a database.
Now after you create your database. Upload the backup files to your new hosting under your domain name. You can upload the files using an FTP or cPanel’s file manager.
After you successfully upload your files. Visit the following URL in your browser.
http://YourDomainName.Com/installer.php
Note: Replace YourDomainName.Com with the domain name that you are transferring to the new host.
You will see the below screen.
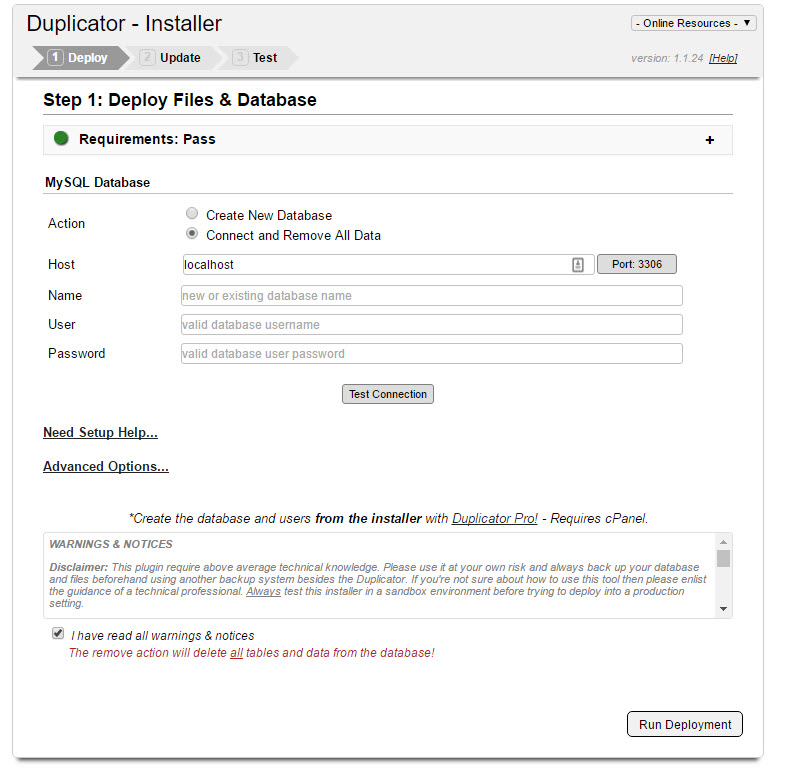
Now provide the database details that you’ve created and click on “Run Deployment” button.
The plugin will now install all the files and databases to your new web hosting account.
That’s it. You’re.
Now you have successfully moved your website to a new host.
Here is an small video that you can watch to understand the process even better.
If you’ve found this tutorial helpful, please don’t forget to share it on social media.