
Today, I will compare the industry leading and best affordable email marketing tools, GetResponse vs Mailchimp.
One of the greatest decisions both bloggers and internet marketers make either in the early stage of their business or later is what best and cost effective email marketing service to use. Making this decision is vital because it largely determines how far you want to go in your business especially if you want direct and re-occuring ROI for whatever it is you do on your blog or website.
Email marketing undoubtably is an old concept, but truth still remains that it’s a major breakthrough for every serious blogger or internet marketer. So many can be achieved with it starting from making you look professional and real to helping you create awesome forms and pages to help your blog or website convert well.
What Can You Do With GetResponse and MailChimp?
As I mentioned above, this article will help you understand more about email marketing tools mainly GetResponse and MailChimp.
Breaking it down, they are email marketing tools that you can use to reach out to your email list via email and send them customized mails about products, offers, newsletters, upcoming events etc.
So below are few things you can do with GetResponse and MailChimp:
==> You can import and create mailing lists using web forms where your blog/site visitors or audience will enter and submit their email information.
==> You can create automated emails and responses to your email list subscribers using an autoresponder feature (more on this later)
==> You can design and customize newsletter templates, not just templates but professional templates with branded images, graphics and photos.
==> You can use them to check or analyze how your blog/site is doing in terms of engagement (open rates of your campaigns or newsletters and actions taken on them).
Alright, let’s get started with GetResponse:

GetResponse Features
- GetResponse has a newbie friendly user interface.
- Send email newsletters, campaigns, online surveys and follow-up autoresponders all from a simple and easy-to-use interface.
- GetResponse has a responsive email designer to make mobile and desktop-ready emails.
- It offers a free 30 days trial that does not require the use of a credit card or billling information. Just signup up free and start using your free trial.
- Allows users to choose or use single opt-in for their campaigns.
- Has an “Inbox Preview” to see how your emails will look everywhere.
- Unlike MailChimp, GetResponse provides a live support help to quickly solve queries and problems online.
- Free strong knowledge base courses, webinars and guides for new email marketers.
- Has a landing page creator to help email marketers easily gather contacts, hencing buidling a formidable email list.
- GetResponse has an autoresponders with a calendar for easy scheduling.
Now let’s see for MailChimp:

MailChimp Features
- Send email newsletters and drip email campaigns from an easy to use app.
- Free for up to 2000 subscribers and 12,000 emails/month.
- Easily create social network profile for every subscriber in your list.
- Email personalization that can fill in names, data, and send emails at the correct time zone.
- Has a drag-and-drop email designer with pre-made templates.
- Tracking for opening rates, click-through rate and more.
- Advanced analytics for your entire lists, and individual open data for each subscriber.
- iOS and Android apps for on-the-go marketing
A Quick Comparison of Some Important Features
The above are some of the core features of GetResponse and MailChimp, now lets briefly compare some of the important features:
On Friendly User Interface (UI)
The ease of use of any marketing tool is one important factor that must be considered when choosing an email marketing solution. The both tools offer good looking interface. MailChimp’s interface is more of minimalistic. It comes with lots of big fonts and white spaces that renders menus, stats and data.
On the other hand, Getresponse, has a modern look with advanced drop-down menu bars and sleek look. I hardly give any of the tools the winner because both interface are clean and easy to use. To an extent the UI of the two can judged on a a personal level. However, for a more neater and professional look, I prefer GetResponse UI to that of MailChimp.
On Pricing and Support
In a review or comparison like this, after all said and done, what comes to heart is “pricing and support.” No doubt, pricing for beginners favors MailChimp because they have a free plan that lets its users send up to 12,000 emails to a maximum of 2000 subscribers.
To some people, this is a killer offer and one way too high above GetResponse. However, when it comes to value for what you get and live support for issues or problems, GetResponse is the best prefereed and the following points sets the record straight:
- GetResponse offer live chat support, email support and phone support (9am-5pm EST, toll-free), along with various online tutorials /resources. The live chat support is available 24/7, which is excellent compared to MailChimp that does not. MailChimp only has email customer support and so if by chance you need an immediate help be sure that it may not come so fast.
- Comparing the $25 plan from MailChimp which comes with 1501 to 2000 subscribers, GetResponse on the other hand has 2500 subscribers at the same $25 rate.
- Design wise, you get real value of your money as most of their templates are 100% responsive, so you will be certain your campaigns or newsletters gets to your subscribers the way it was when you previewed and sent out.
On Design Tools and Branding
When it comes email design tools and branding, GetResponse has a good looking background compared to MailChimp. It provides two different options for the users wanting to create a newletter or email messages.
The first option is the “New Email Creator” tool. This is simple and easy to use because email templates have already been created in them.
The second option GetResponse offers when creating newsletters is called the “HTML Source Editor” which is for advanced users who knows their way around HTML. Here is what GetResponse newsletter creator look like:
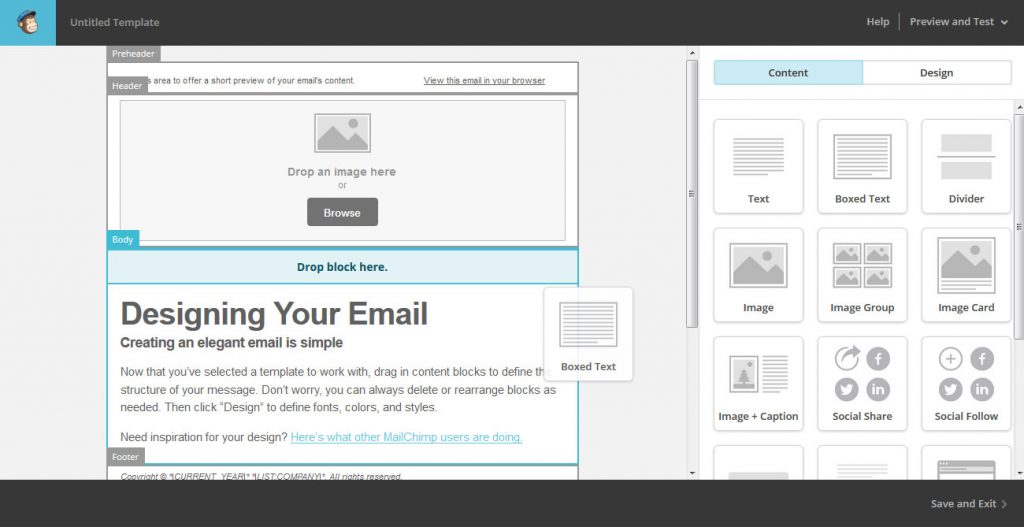
Still on design and branding, sending emails on MailChimp is also easy as it uses a drag and drop email creator. Before now, MailChimp users were forced to learn HTML coding as the process was a bit tedious. It’s no longer the case today. MailChimp now has a built-in photo editor which you can use to tweak your images. This what it looks like:
While the both email template builder look simple, I still prefer that of GetResponse that comes with already created template designs, that’s to say that GetResponse is good for basic and advanced users.
On Analytics
Having an email marketing campaign set up is one thing and monitoring how your audience respond is another thing. This is where “Analytics” comes in. Good thing is that the two has the analytics feature integrated and performs well. However, GetResponse is a bit ahead of MailChimp because of its automatic creation of emailable ‘groups’ after a mail is sent out.
Better AutoResponders
With Autoresponders, you easily send automated emails to your subscribers either daily or weekly. This can be courses or follow-up emails scheduled to send out on a certain date or day. Both GetResponse and MailChimp offers an easy way to set up a series follow up emails.
My Verdict on Design, User Friendly and Customer Support
GetResponse is the winner here. Starting from when you land on the homepage to browsing through the site, everything looks professional and easy to navigate. The part of live chat support makes GetResponse have an edge over MailChimp.
Getting Started with GetResponse ~ Basic Settings
First will be to sign up for a free trial account. When you do, check your inbox for an email from GetResponse that says:
You’re almost done, we just sent you an email! Please open it and click the activation button. Once your email
address is confirmed, you will be able to activate your account.
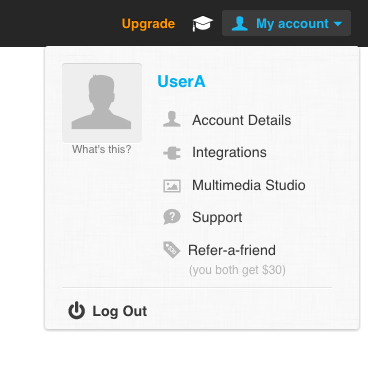
Once your account has been confirmed log into your dashboard, on the navigation bar and you will see “My Account” with a drop down menu. Click on it and select “Account Details.”
This is what it should look like:
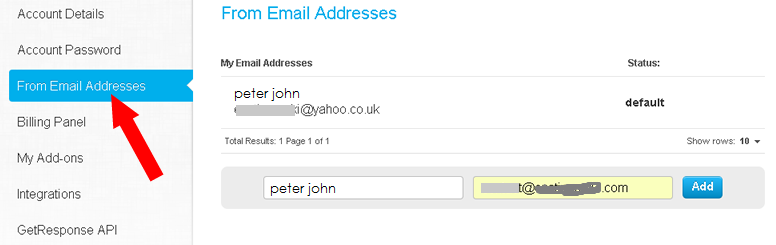
 Once you click on the Account Details link, you will be taken to the Account Details page, now click “From Email Addresses” to either modify or add as many different email addresses and names as you want.
Creating a Campaign on GetResponse
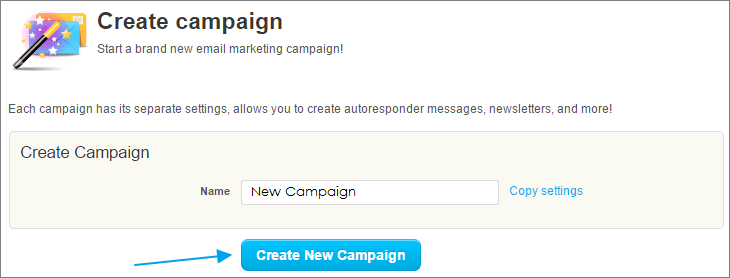
Now let’s see how to create a new campaign in GetResponse. Basically what you need to do is click on the gear icon located under the navigation bar and then click on “Create Campaign amongst others.
The new campaign name form will load and then you enter your new campaign name as shown below. You can use any name you wish all in small letters, numbers and the underscore symbol “_”
Your subscribers are not going to see the name because it’s only used to identify or differentiate a campaign from host of others. See an example of mine below:
Once your campaign creation is successful you will see a successful campaign creation message, that simply shows that you now have your campaign set up.
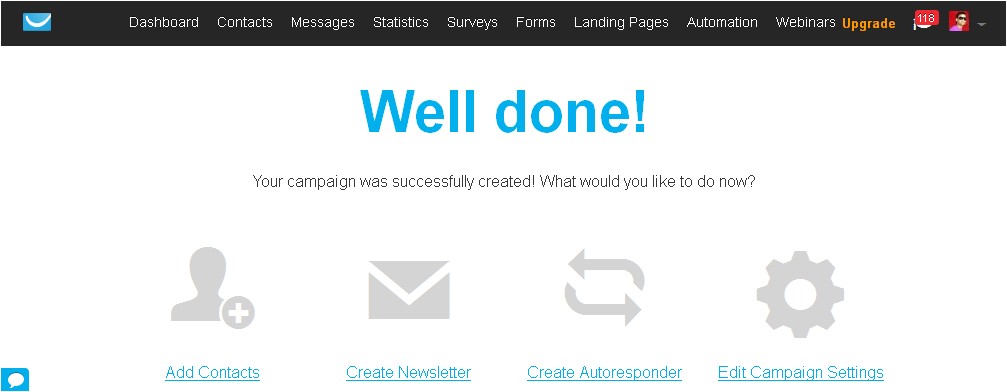
As you can see, there are couple of options above that you need to check with but the most important among them is the one I pointed which to edit your campaign settings. You need to do this first before ever moving your contact or whatever.
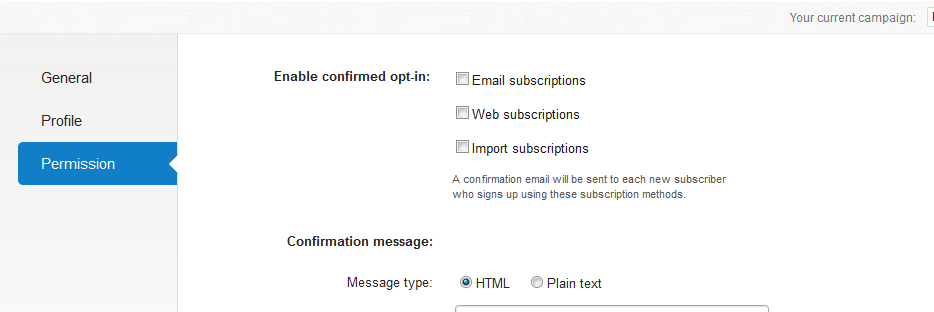
Clicking on the Edit Campaign Settings will take you to the Campaign Preference Page. Next will be to click on Permission tab so you can continue with the settings.
Basically, what you will be editing or setting up here is your Confirmation Message.
By default, when someone signs up to your list, the person will receive an automatic message that reads “Welcome!” Most people will leave this part and jump into placing sign up form on their blog which is very wrong. Doing this is important and so make sure to do so when creating a campaign.
On step 3 are two options 1. Hosted by GetResponse and 2. Custom URL.
The first option means that the page that will display the confirmation message when someone signs up to your list is hosted by GetResponse. However, if you wish to tweak that page maybe using a dedicated page on your blog either for promotional purposes or something else, you then tick option #2.
Once this is done, you can then go ahead to add your contacts and sign up forms on your blog or websites.
Getting Started with MailChimp ~ Basic Settings
As usual, the first thing will be to sign up for a free account.
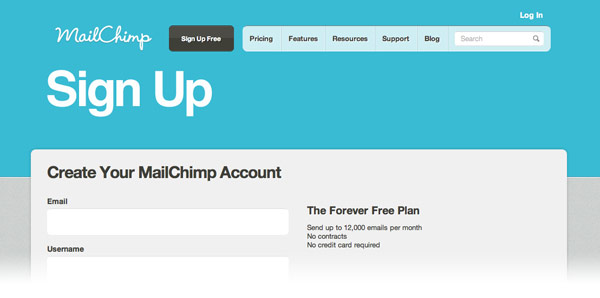
The above is the message you will get when you sign up so check your email to confirm your account registration, afterward log into your dashboard and complete your account profile details.
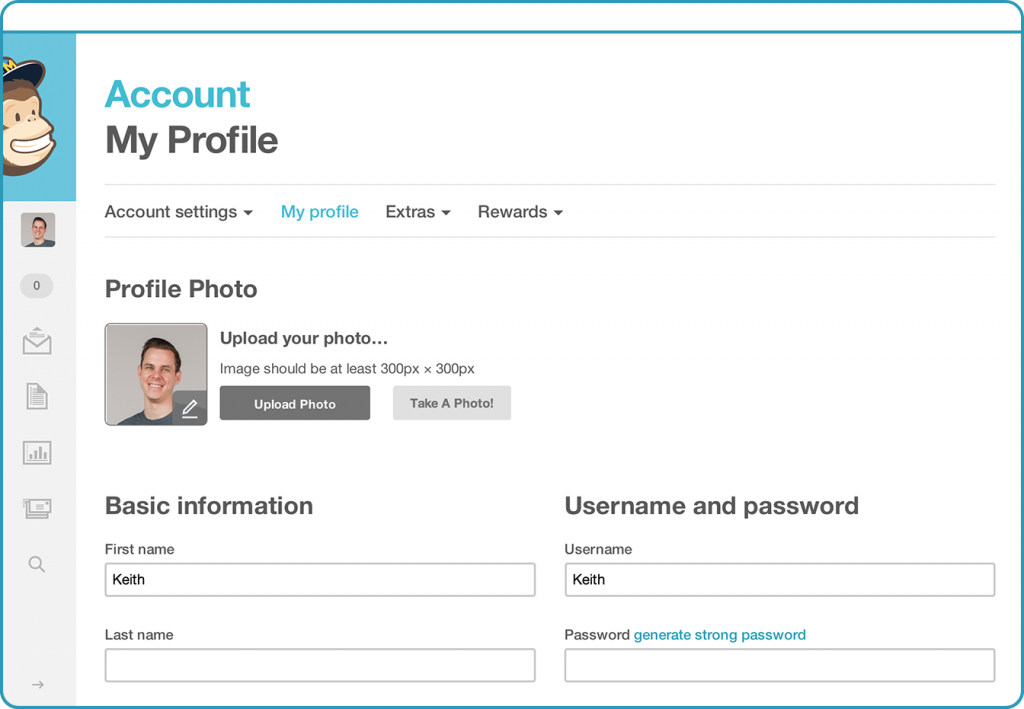
Setting up a profile is same as completing account details. MailChimp will ask for your name and physical address, website/blog address and the industry your blog or website belongs to. All these you must enter before you can continue.
One of the setups I did in GetResponse under Account Details was the “From Email Addresses” to either modify or add as many different email addresses and names as I want. In the case of MailChimp, this can only be done when you are creating a Campaign or List (a list also known as subscribers is the group of people you will be sending campaigns or newsletter to).
I prefer to create list first so I can setup the “From Name” and “From Email Address”
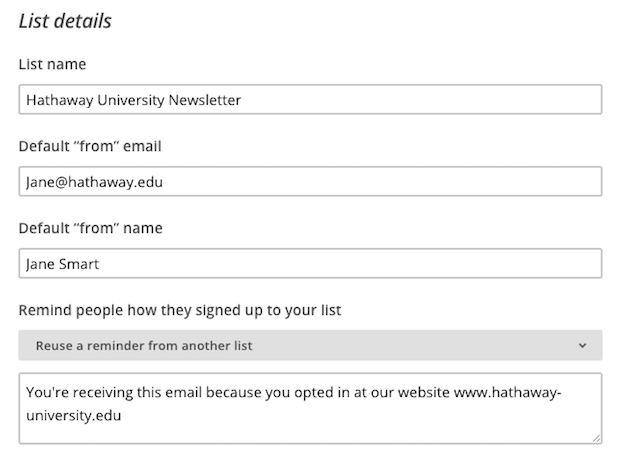
Under “Remind people how they got on your list” you can simply write something like:
“You are receiving this email because you opted in at my blog or website www.yoursiteaddress.com.”
You can write any action words there, just be creative.
Upon completion of list creation, you will be taken to the successful page that says:
You have no subscribers
Import subscribers or setup a signup form to get the ball rolling.
At this point, I recommend you hold off with importing subscribers (if you have one) until you have setup your lists’ “Email Confirmation Message.”
To do that, you will need to click on setup a signup form as shown in the above message and then Opt-in Confirmation Email from the drop down options under Signup Form.
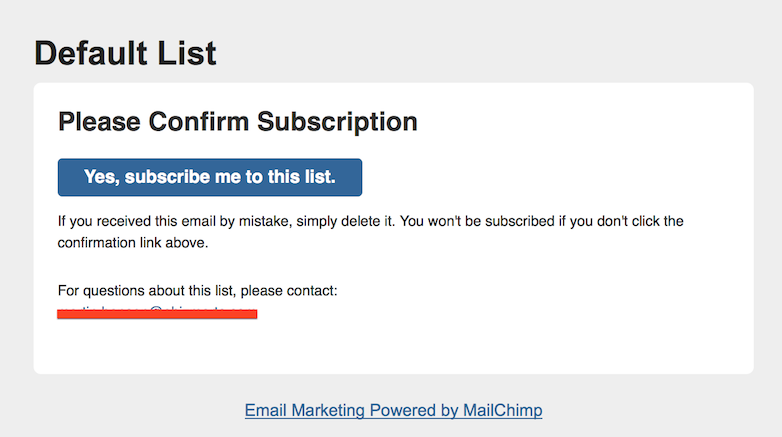
Upon clicking on opt-in confirmation email, you will be taken to page where you can now setup your confirmation message. This is the message that will be sent to your subscribes once they signup to your list
Something like this will do:
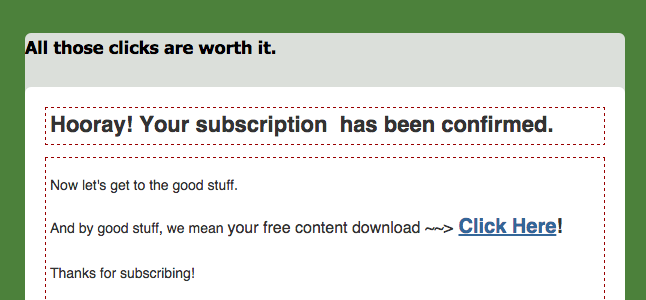
When people opt-in at your blog, next will be to send them to a Confirmation Page to show that they have successfully subscribed. GetResponse has its confirmation page settings directly under the Confirmation Message Settings which I really liked. MailChimp on the other hand requires you to set up the Opt-in Confirmation Email and Confirmation Message separately.
Creating a Campaign in MailChimp
To create a campaign in MailChimp simply click “Create Campaign” on top right corner of your account dashboard to create a campaign of your choice.
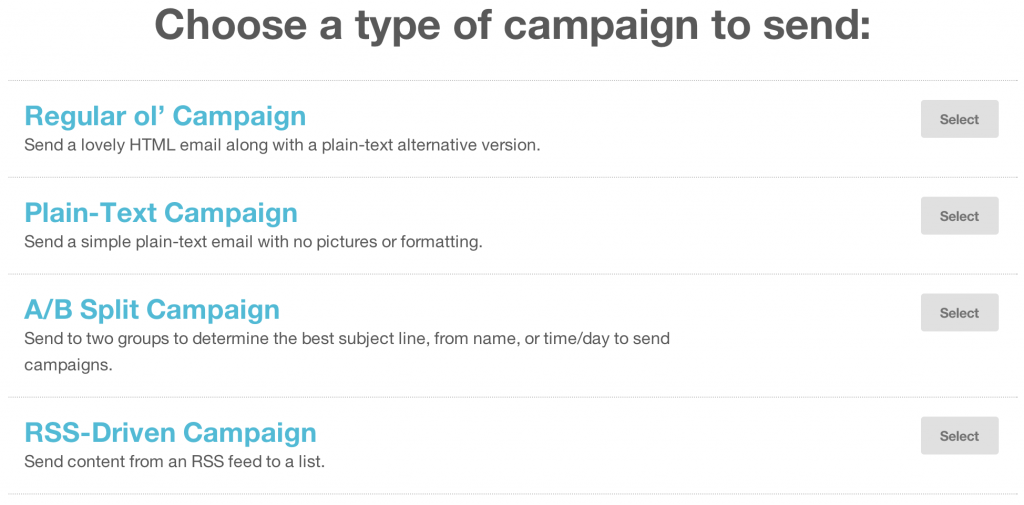
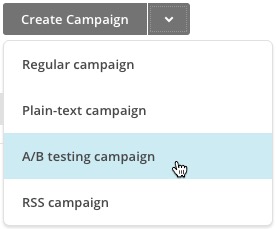
As you can see on the screenshot above, you can create a:
Regular Campaign ==> Send a lovely HTML email along with a plain-text alternative version.
Plain-Text Campaign ==> Send a simple plain-text email with no pictures or formatting.
A/B Testing Campaign ==> Send up to three variations of a campaign to test the best subject line, from name, email content, or time/day to send campaigns.
RSS-Driven Campaign ==> Send content from an RSS feed to a list.
Since you have already created a list. You can easily select the list as the recipient of your campaign.

My Verdict on GetResponse and MailChimp Basic Settings/Setup Process
I found GetResponse to be user friendly, the steps required to do the basic settings especially the campaign settings is so easy and direct. Newbies won’t have a hard time setting up their first ever campaign and other basic settings on a first visit.
Moving Contacts from Another Platform to GetResponse
For some reasons people move their contacts from one platform to another. This single act results to spamming activities because people can use this medium to unnecessarily harvest email address from one platform to the other. This is where most EMPs gets strict. Because of this single act, most EMPs put some security checks to determine if the person trying to move contacts into one platform or the other is real.
Moving contacts or your subscribers from another platform to GetResponse is simple. There are 3 major ways to do that.
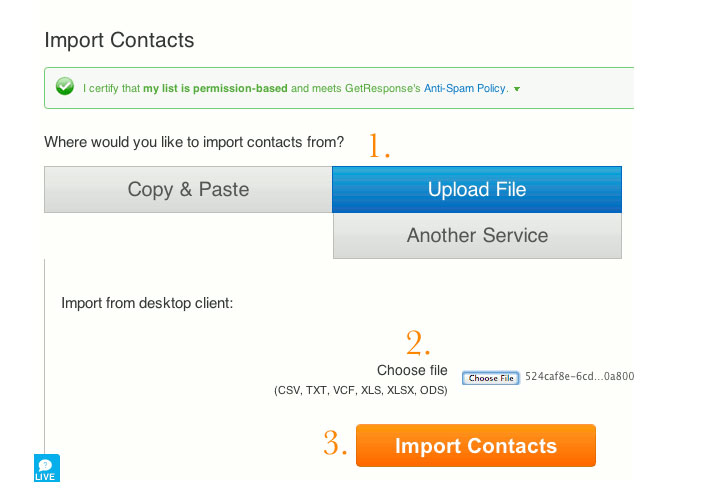
1. You can Copy and Paste email addresses line by line,
2. Upload a file (CSV, TXT, VCF, XLS, XLSX, ODS formats)
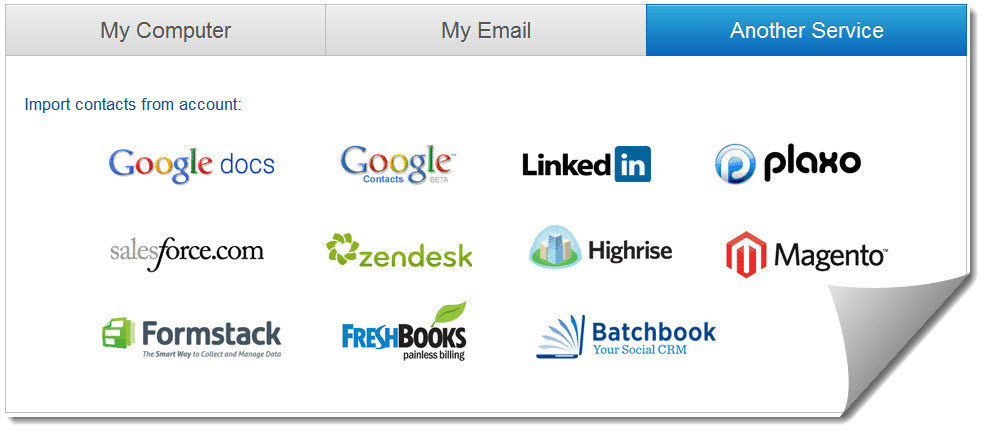
3. Connect and import directly from Another or Integrated Services (like the ones shown below) to your contacts.
Once your contacts are imported, you can instantly start mailing your subscribers. GetResponse does not require any double opt-in or contact upload verification in the importation process.
Moving Contacts from Another Platform to MailChimp
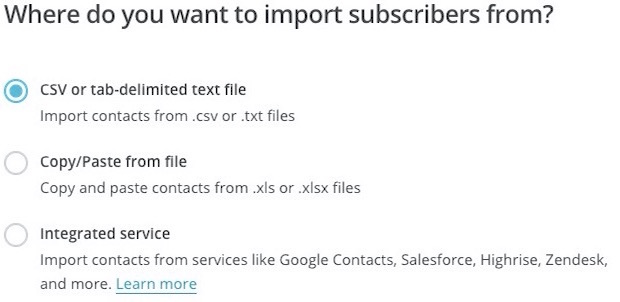
Just like GetResponse, importing contacts into your account is very easy. You also have the same options as GetResponse, copy and paste, file upload and upload via integrated services.
Again, no further verification is required to confirm contact migration. Once you have successfully uploaded your contacts you go ahead and start mailing your list.
My Verdict on Moving Contacts from one Platform to Another on both EMPs
Unfortunately, while reviewing GetResponse and MailChimp, I found out that two of them allows for simple movement of contacts without strict security measures. So there is no winner here because I strongly believe that a certain level of security checks or measures should be added.
Here are cautionary words you will see on both EMPs:
GetResponse: I give my word that my list is permission-based and in accordance with GetResponse anti-spam policy.
MailChimp: We do not send confirmation emails to imported addresses and trust that you’ve gathered proper permission to send to every address on your list.
Email Templates
When it comes to email marketing, the quality and quantity of templates at your disposal matters a lot. GetResponse and MailChimp have good templates that cuts across several industries. I was able to peep into their respective template galleries:
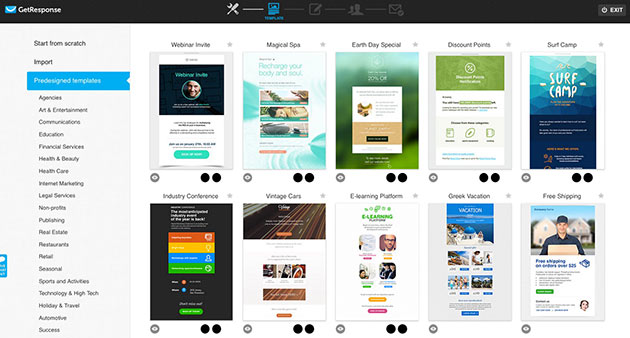
GetResponse Template Gallery
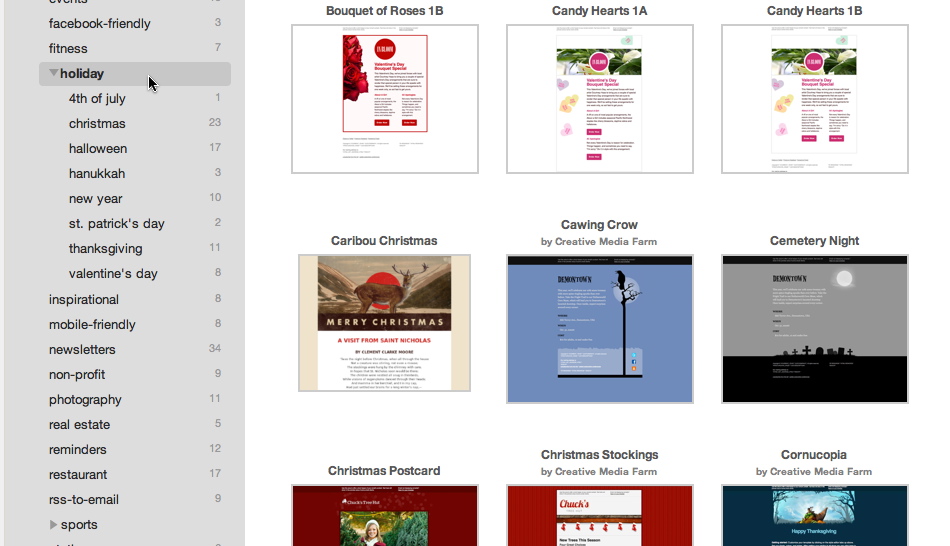
MailChimp Template Gallery
Winner: I hardly can say if there is any winner here because this feature should be personal. The design I like may differ from the design another person wants. Hence, the two EMPs have good looking and responsive templates professional enough to project your campaigns or newsletters.
However, on a personal note, I will go for GetResponse!
Autoresponders ~ GetResponse
This is another awesome feature of EMPs. It’s a feature that allows you automate your email marketing. In other words, autoresponders are series of email marketing messages that are automatically sent to your subscribers in the order or frequency of your choice.
Also with autoresponders, you have a variety actions you can choose to trigger when people either sign up to your site, buy a product or any other thing.
To create an autoresponder, simply click on the ‘Messages’ tab on the main navigation bar, and you will be taken to the page where you will have the option to select what action that will trigger your autoresponder.
There are different options you can choose but the main one to use is the ‘Time-based.‘
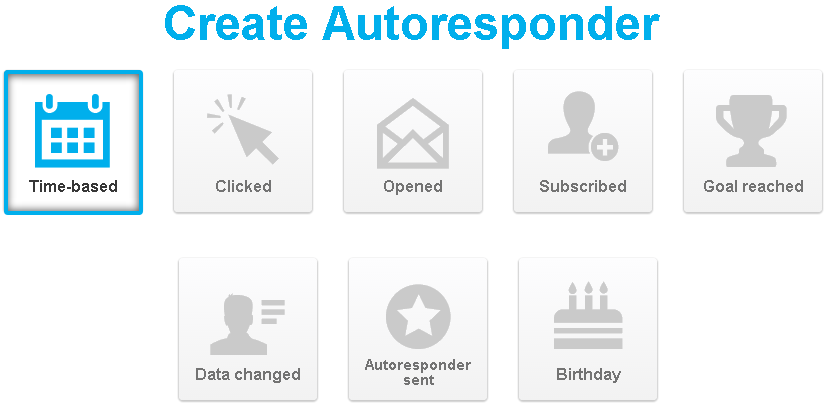
It’s personal, so the option you select will depend on the nature of your business or what you do. So you can always decide what day(s) to automate your emails.
Autoresponders ~ MailChimp
First thing to note here is that before ever you can setup an autoresponder account in Mailchimp, your account must be a paid account. The MailChimp free account does not allow you access to the autoresponder.
So to get started, navigate to your account dashboard and click on the ‘Automation tab’. Then click on ‘Create Automation Workflow’ button (located at the top right hand corner).
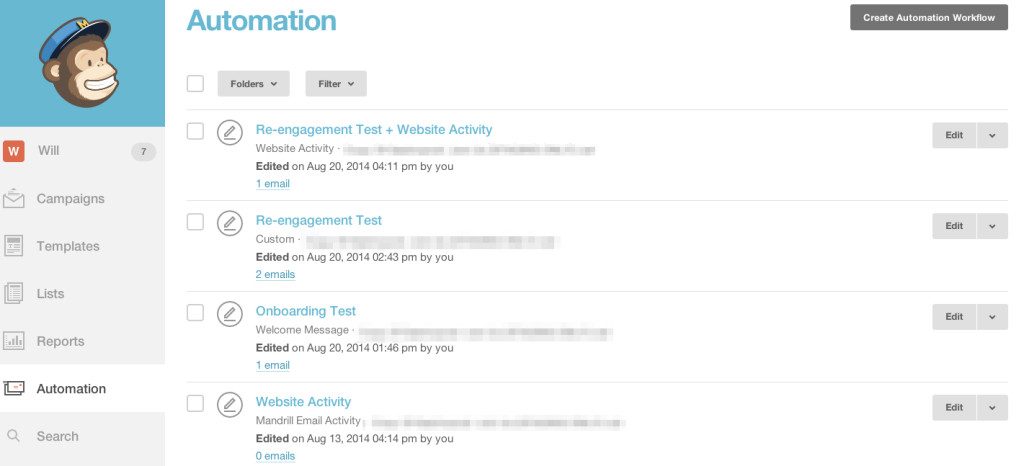
There will be a drop down menu click and select the mailing list that your subscribers will be added to.
After you select your list, an array of preset workflow types based will be displayed on different events you can use to trigger an Automation workflow. To use one of the grayed-out workflows, your list needs to meet the indicated requirements.
Now select the type of ‘workflow’ you are creating. An example can be a welcome email to those signing up to the list you selected.
For an ‘auto responder series’ you can select either Educate subscribers or Custom. (Cases whern Custom is used is when you are incorporating triggers in your campaigns or email series).
I selected the ‘Educate subscribers‘ workflow and then gave it a name. The name can be anything you wish. It’s only for internal use. I named mine ‘My Newsletter.‘Next will be to select what will trigger the email to send.
When setting up a workflow, you need to make sure you add the date that it will take effect from, otherwise it won’t work. Once you have done this, you can then design your email content that recipients will receive.
Upon completion, you can then click ‘Start Workflow’ to get the ball rolling.
Winner: Draw
Split Testing or A/B Testing
A/B Testing otherwise known as Split Testing is an email marketing technology that allows you to test different versions of a single campaign to see how best they can perform or yield results.
Variables you can test include; Subject lines, From name, Content, and Send time. All these depends on your business and what you are targeting.
The idea behind A/B Testing is also to find out when your subscribers are most likely to open the campaigns you sent to them.
Split Testing Using GetResponse
To get started or run a split test or A/B test on GetResponse, all you need do is to create a new message and then enable the split testing option. Enabling the A/B Testing feature will then allow you to test different areas of your campaigns.
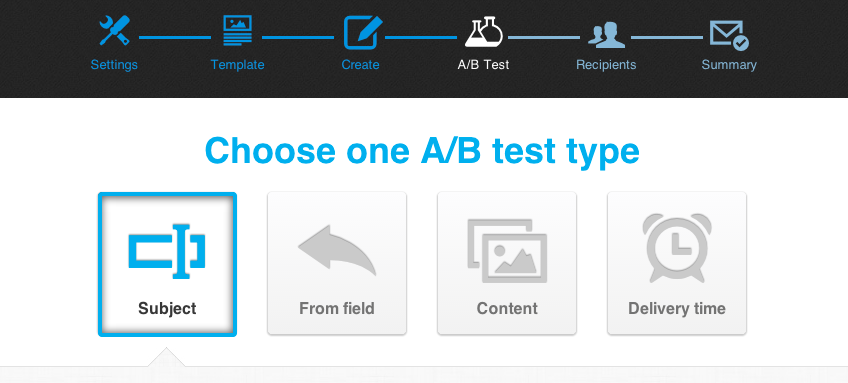
After turning on the A/B Test click on Next to choose a template of your choice after which you select the variable you wish to test.
The screenshot below shows 4 different variables you can test. Which ever one you select, you have the option of adding up to 5 variations to exapand your chances of knowing which variable that brings result.
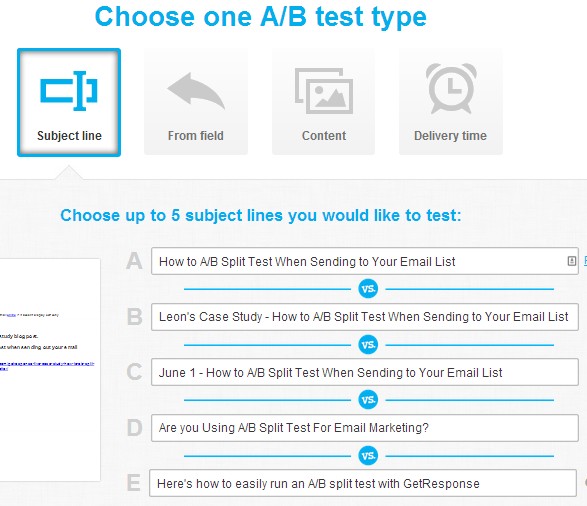
In this review, I selected ‘Subject Line’ and I have the option of adding up to 5 Subject Lines as you can see below:
The split test assigns rating in percentage and the followed by winning message. All you need to do is make sure you select the ‘Send Best Message Automatically’ button to get the best results.
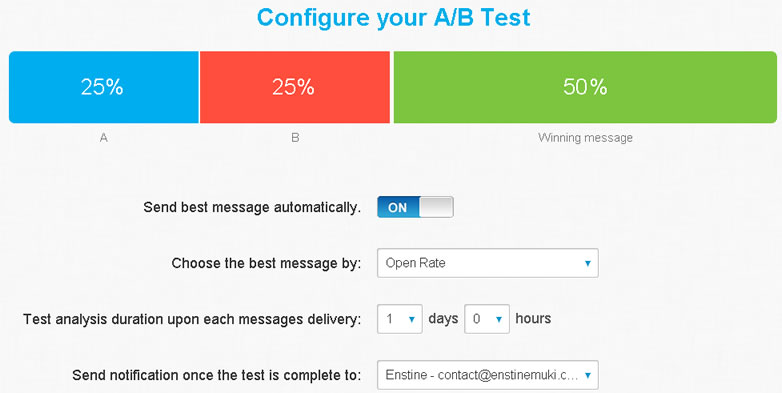
When you are done click next to see the message summary after which you decide to either schedule or send to your subscribers.
Split Testing Using MailChimp
Unlike GetResponse, you need not create a new message to do an A/B test campaign on MailChimp. There is already a dedicated link for it under campaigns.
To get started, navigate to the ‘Campaigns page‘ and click the drop-down menu next to ‘Create Campaign‘ and then choose ‘A/B Testing Campaign.’
On MailChimp, you can send up to three variations of a campaign to test the best subject line, from name, email content, or time/day to send campaigns.
After choosing the ‘A/B Testing Campaign‘ next will be to select the list to which MailChimp will send the campaign. You will automatically be taken to your lists page so you can select the list you want.
Once you choose which list to send the campaign, you will then be taken to ‘Variables stage‘ where you can now select the variable you want to test. MailChimp will generate a campaign for each combination of the variable with a maximum of 3 variations or combinations.
Just like GetResponse, there are also 4 variables you can test. Again, I chose the ‘Subject line’ variable and under it I can select a maximum of 3 subject lines or variations to test.
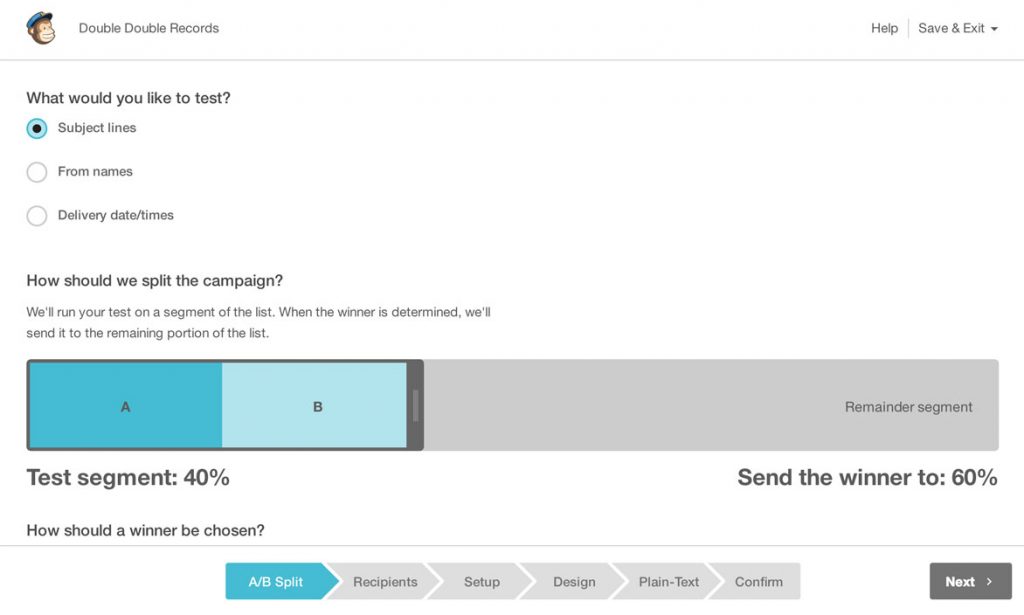
The ‘Test on a percentage of recipients to send a winner‘ option allows you to send subject lines or variations or combinations to the testing portion of your list, and the remainder will send to the winning combination.
If you selected to test based on a percentage, make sure to click and drag the slider to set the percentage of your list you want to send your test to.
Another important thing you must do is to set the ‘Under What metric should determine the winner‘ field. Here you have the option to choose if you want the winning combination to be picked by highest open rate, click rate, or manually after which you select the length of your test.
MailChimp allows you to choose the winning subject line or combination at the end of the selected test time which they will finally send to your remaining recipients. During the test phase, you also have the option to convert to manual selection to choose the winner from the campaign report.
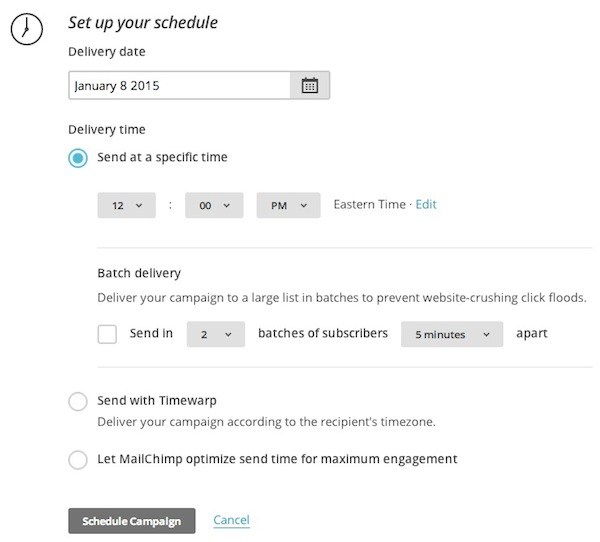
Confirm Step
The Confirm step is same thing as ‘Message Summary‘ as we have in GetResponse. This is where you’ll review the:
1. Combinations that make up your A/B Testing Campaign.
2. Pre-delivery Checklist.
3. Click Resolve or Edit to make changes to any section of the campaign.
And then Send your campaign right away or schedule it to go out later.
My Verdict on Split Testing
The two EMPs have wonderful split testing features and the steps required to do it are almost the same. However, I discovered two difference in the two. While GetResponse requires you to first create a new message before ever you can turn on the A/B test function, MailChimp gives you a better option to directly create an A/B test and send your campaign.
The second thing I discovered was the number of variations allowed to test. Here GetResponse allows up 5 variations which I really love while MailChimp only allow for a maximum of 3 variations. As a blogger or internet marketer, having more variations to test gives you more chances to get best results for your campaign.
Aside these two differences, I give the both EMPs a draw!
Message Builder
Comparisons like this helps us to understand the different email marketing terminologies. For example, in GetResponse, you will see something like ‘Newsletter‘ while MailChimp calls it ‘Campaign.‘ In all the two means the same. You only need to understand what terminology an EMP is using and that will be just fine.
The message builder of the two EMPs are well built. The two have almost the same thing in common. However, GetResponse gave MailChimp an edge over it’s mobile preview.
While GetResponse shows you the mobile preview of your newsletter in real time, MailChimp does not, rather you will need to click on the ‘Preview and Test‘ button then click on ‘Enter Preview Mode‘ to view the mobile version of your campaign or newletter. This to me is time taking.
My Verdict on Message Builder
While the two have good message builders and almost the same features, the single fact that I can preview the mobile version of my newsletter or campaign in real time makes GetResponse the winner here. It’s no news the fact that there are more of mobile users than desktop users on the internet today, and as a blogger or internet marketer, GetResponse is definetly a take here!
Creating Web Forms
Web forms are simply the sign up forms you placed on your blog/website. They are the real game player because you actually use them to collect people’s name and email. Infact, the very first step of email marketing starts from your web forms and the strategic places where you place them.
Let’s look at the designs and web form types you can create on GetResponse and MailChimp:
On GetResponse
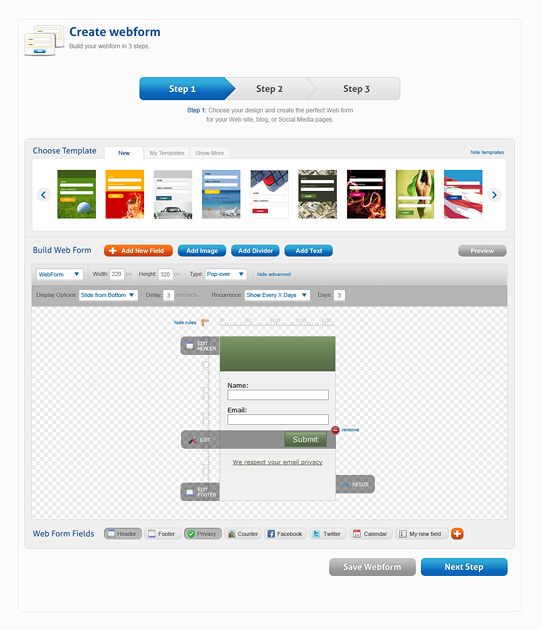
GetResponse has a web form creation wizard that lets you create and design webforms or signup forms with ease. Just go ahead and pick from their over 200 pre-made templates and start your email marketing campaign!
On MailChimp
While GetResponse allows you to choose pre-designed web forms, MailChimp does not. You can build and design a simple web from and generate HTML codes which you can paste on a text widget or embed in your site or blog to collect signups.
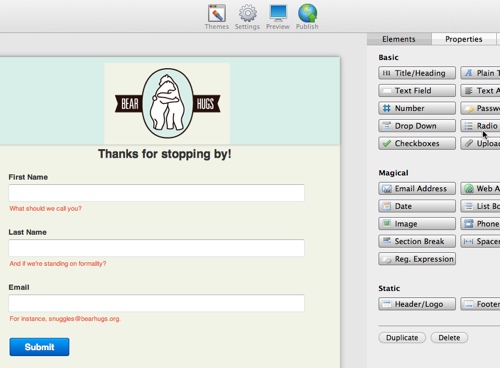
You can also decide to use the signup form URL and embed in your post or promotional newsletters. Just be creative.
Winner: The design of web forms to a great extent help to draw people’s attention and also push them to take action. With the array of beautiful pre-designed web forms on GetResponse, it’s obviously the winner here!
Some Reasons to Use GetResponse Over MailChimp
There are three (3) key features that are not present in MailChimp, they are
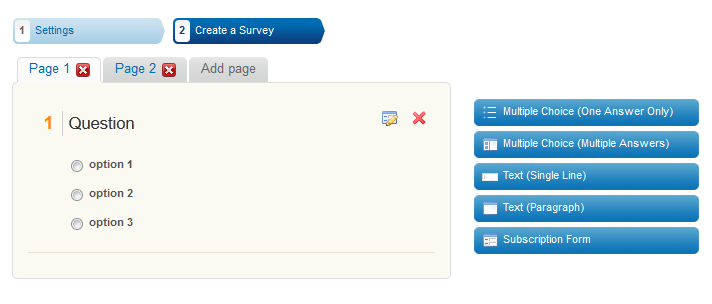
1. Survey
Asking for the opinions of your subscribers from time to time is one awesome way of knowing how best you are impacting on them. With the GestResponse survey tool you can do much more on your site. Also as a GetResponse user, you need not bother scouting for a third party tool to set up or manage surveys on your site.
This is another awesome edge GetResponse has over MailChimp!
2. Landing Pages
Landing pages otherwise known as “lead capture pages” are single web pages that shows up in response to clicking on a search engine optimized search result or an online advertisement.
In the present day email marketing, landing pages play vital roles. The following are few advatages you have over a MailChimp user:
1. Helps you easily generate leads.
2. Give your offers or products a place to live.
3. Helps you easily collect demographic information about your prospects.
4. Helps you understand which prospects are more engaged.
5. Provides fuel for other marketing channels.
6. Offers insights into the effectiveness of your marketing offers.
For more information on the benefits of landing pages, see this article.
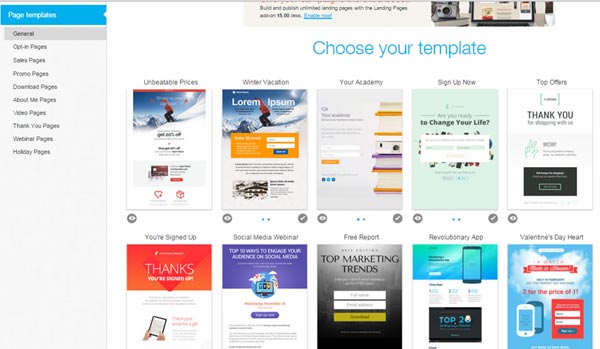
With GetResponse, you can create professional looking landing pages from their over 8 categories of pre-designed templates!
3. Live Chat Support
Doing business online requires you have 24/7 access to support on tools or products you use to power your business.
Know that:
In email marketing, one cannot afford losing money knowing fully well that money is in the list!
The very main reason I hail GetResponse more than MailChimp is because of their 24/7 customer LIVE CHAT support. Who wouldn’t be happy to hit ‘Live Chat’ button and in seconds gets a reply from a human ready to assist?
This is the win-win strategy I love so much about GetResponse. This is contrary to MailChimp. There is no customer live chat support so if along the line you are stucked, you just have to either write them a mail or probably call on phone which gives you little or no chance of communicating the way you want.
I did a test on GetResponse customer live chat support and in seconds a customer support staff answered me!
GetResponse Pricing
- $15/month for unlimited emails to 1k subscribers
- $25/month for 2.5k subscribers
- $45/month for 5k subscribers
- $65/month for 10k subscribers
- High volume pricing available
MailChimp Pricing
- Free Entrepreneur plan for sending up to 12k emails to up to 2k subscribers
- $10/month for unlimited emails for up to 500 subscribers, and around $5/month per additional 500 subscribers
- $15/month for unlimited emails for up to 501 – 1,000
- $20/month for unlimited emails for up to 1,001 – 1,500
- Pay-as-you-go with prices starting at $0.030/email
- High volume sending from $450/month for up to 85k subscribers and 1,020k emails
My Final Verdict
GetResponse as well as MailChimp are great tools for email marketing. However, GetResponse clearly has more striking features which makes it a perfect tool to create targeted and customized email marketing campaigns for your business.
If you are looking for free email marketing tool with limited features, MailChimp would do for you. But if you are a blogger or internet marketer looking for a cost effective email marketing software with a wide range of features such as 24/7 customer live chat support, professional pre-designed templates/webforms and above a landing page creator tool, then you GetResponse is undoutably what you need for your business to be successful!
Good news is that GetResponse has a 30 day free trial offer with full features, and doesn’t require credit card information to start!
What do you think? Let us know in the comments section below