
Transferring a website from one host to another is always stressful and involves downtime.
As soon we change the NameServers of our domain name, it takes 24 to 48 hours to propagate across the internet.
During the propagation time, our website becomes inaccessible.
But,
In this article, I will tell you a trick that you can use to reduce the downtime to almost ZERO.
Before I proceed further, let me tell you a small story behind this method.
If you are a regular reader of our website, you must be aware that this website was hosted with Hostpapa.
But last week I got an email from Hostpapa’s support team. As per their email, my website is receiving a good amount of traffic and consuming a lot of resources which their shared hosting cannot handle.
Further, they have also suggested me to move my site to their VPS plan else they will terminate my account.
Without wasting my time, I logged into my Analytics to see if my website is actually receiving a lot of traffic that a shared server cannot handle.
Surprisingly, I was getting normal traffic.
My analytics report told me that my website was receiving only a few hundred visitors a day.
I got my answer. Hostpapa server was not reliable. My website was receiving hell lot of bot traffic which their firewall was not able to eliminate.
I immediately purchased a hosting plan from Godaddy.
And now the actual problem starts.
I realized that if I changed the nameserver, my website will become inaccessible.
I start reading articles on the internet about “how to move a website to a new host without downtime?”
Unfortunately,
I couldn’t find an article which could solve my problem.
Then, I watched few videos on Youtube and found a video which gave me an idea and I moved my site without downtime.
How to Move WordPress Blog to a New Host or Server (with No Downtime)?
To move your WordPress blog or website to a new server or host, you should have the following things ready for you.
- Access to your domain control panel
- Access to your old WordPress website
- Access to your current web hosting control panel
- Access to your new web hosting control panel
If you have access to all the 4 things I have mentioned above, let’s start the migration process
Step 1: Take Backup of Your Website’s Database
To take backup your website’s database, you have to install a plugin called WP-DB-Backup.

After you install the plugin, Goto à Tools àBackup.
Now a backup wizard will come up.
Click on the “backup now” button, and the backup process will start.
After the process is over, your backup will automatically download to your computer.
Step 2: Take backup of your WP-Content Folder
WP-Content folder of your website is the place where your plugins, images, videos, themes etc. are located.
Taking a backup of this folder is very important in order to move your site to a new web hosting provider.
To take a backup of this folder, log-in to your current web hosting’s cPanel.
Now GoTo -> File Manager -> Public_html -> Open the folder with your website’s URL
As soon your website’s folder will be open, you will see a folder with the name “WP-Content”.
Select this folder, and now click on the “Compress” button from the menu.
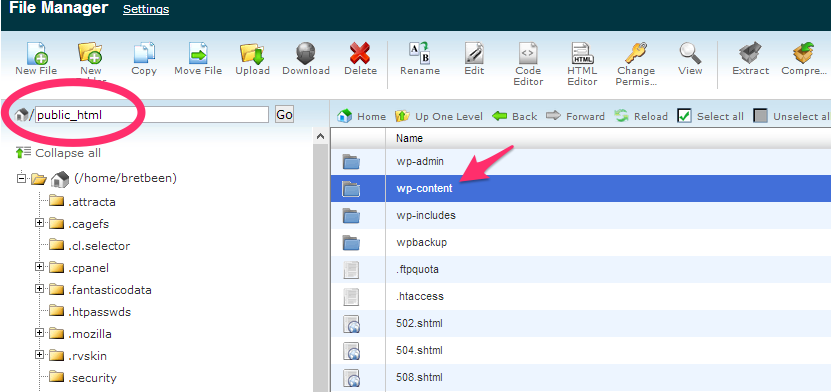
Save the file in Zip format.
Once the compressing process is complete, download the Zip file to your computer.
Step 3: Add your domain name as an Add-On domain in your new hosting account
To host your website to your new hosting account, you have to add your domain name as an add-on domain name.
Special Note: This step is only applicable if your domain name is not the primary domain for your new hosting. If your domain is primary domain for your new hosting, you can ignore this step.
To do this, log-in to your new web hosting’s cPanel. Now go to the domains section and click on Add-On domain name.
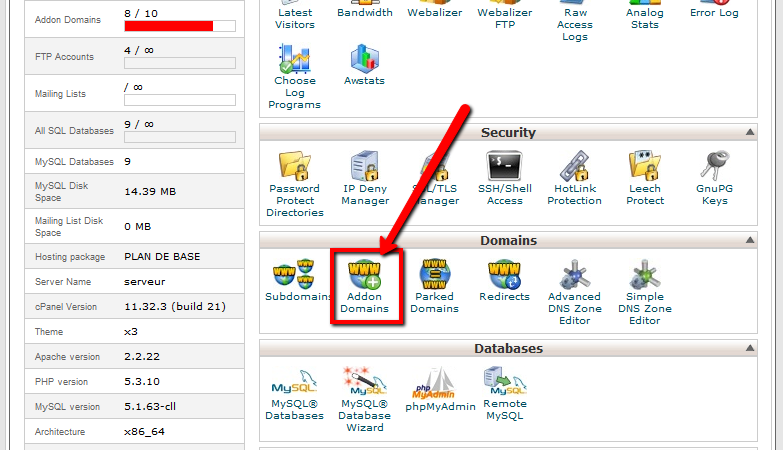
Now, type your domain name under the “New Domain Name” field and click on “Add Domain” button to add your domain name.
Step 4: Install WordPress
In your new hosting account, Install WordPress on your domain name which you have just added.
To do this, look for the WordPress icon in your cPanel, Or select Auto-installer to find WordPress script.
Click on “Install” button and fill up the required details and proceed to complete the WordPress installation.
Once the WordPress installation is done, move to step 5.
Step 5 : Restore Database
Once the WordPress installation is complete, we’ll restore the database backup that we have taken during the step 1.
To restore the database, go to the cPanel of your new web hosting account.
Now go to PHP MY-Admin.
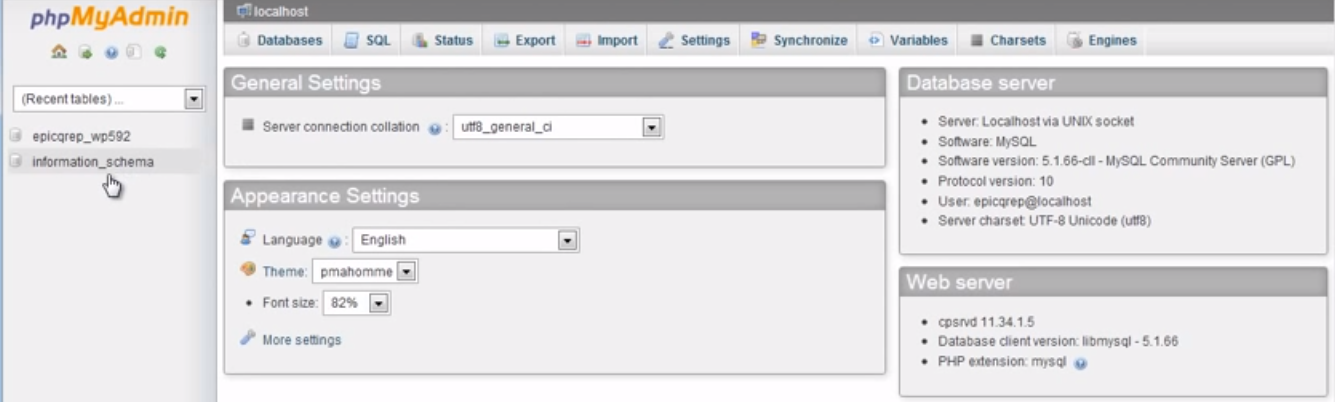
You will see all the databases on the right-hand side of the screen.
Expand the database of your website by clicking on its name.
Once it is expanded, you will see all the tables within the database. (See the image below)

You will see a table name “WP-Options”.
Click on it.
After you click, it will show you some details about the website e.g URL, Website Name, Description. This is how you can make sure that you are working on the right database.
Now we will upload our backup to this database to restore.
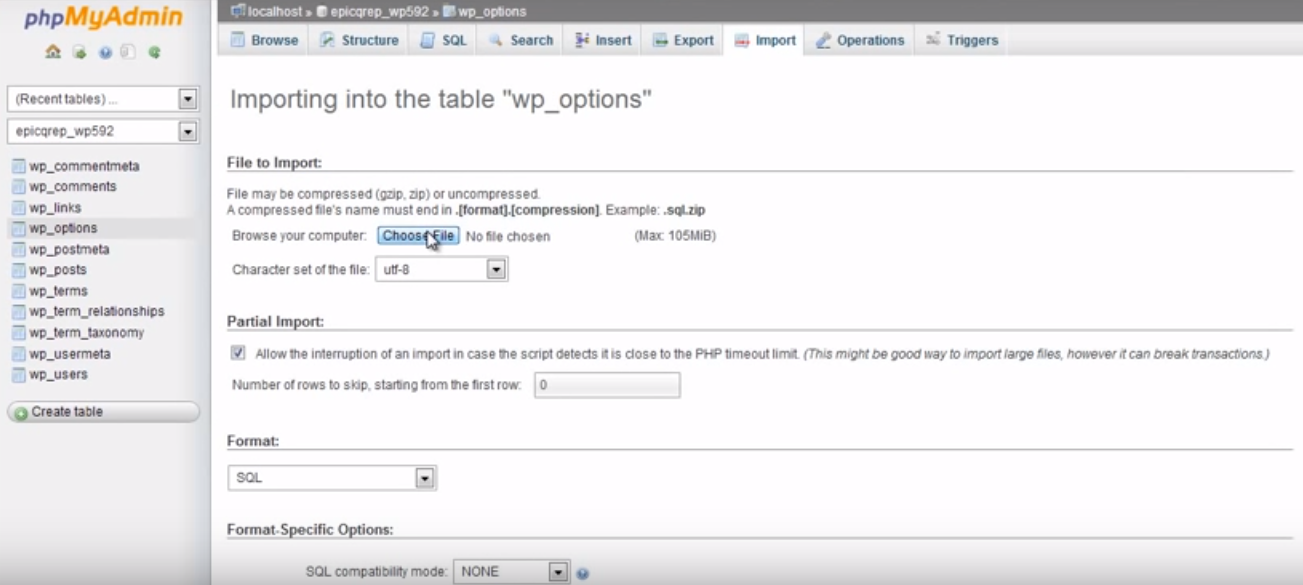
To do this, we will import our database using the “Import” feature available in the main menu. (Learn how to use import feature)
Click on the “Import” button in the main menu.
A window will come up.
Click on the “Choose File” button and select the backup file and click on the button “Go”.
The process will start and your database will be restored.
The process may take few minutes to complete based on the size of the database.
Step 5 : Restore WP-Content Folder
After we’ve restored the database, it is the time to restore the backup of our WP-Content folder.
To do this, log-in to the cPanel of our new hosting account, and go to the File Manager.
Now GoTo -> Public_Html -> Your Website’s Folder -> WP-Content
Open the WP-Content Folder and delete all the file which are there.
Now upload the ZIP file of our WP-Content folder here.
Extract the file.
You will see that one more WP-Content folder has been created under WP-Content. The structure of this folder will be like this.
Public_Html -> Your Website’s Folder -> WP-Content -> WP-Content
Now open this folder and select all the files and move them to the original WP-Content folder. After all the files are moved, the structure will look like this.
Public_Html -> Your Website’s Folder -> WP-Content -> Files
Now our site is moved successfully and it is the time to move to our final step.
Step 6 : Change NameServers
This is the final step of this process. All of our website’s files and database are already restored.
Changing nameservers will make your site running on the new hosting account.
To change the nameservers, Log-In to your domain’s control panel.
Now go to DNS settings and look for Name Servers settings option.
Replace the old DNS with the DNS settings provided by your new hosting provider.
Save the changes. You’re Done.
Final Words
Now your site has been successfully moved to the new hosting account.
This way we can minimize the downtime to almost zero.
I find this way very effective and have successfully moved two of my sites so far without any downtime.
I have read many tutorials on the internet on moving WordPress site from one host to another without downtime, but this one is the best among all of them.